As mentioned in the previous installment, I had obtained a set of spars off of a nice fellow from Craigslist along with a spare daggerboard. The spars that had come with the Snark were painted a gold color with the original nylon eye straps and O-rings for the rigging but using standard hardware store eye screws on the ends for the sail outhauls (the lines that tie and pull the sail tight towards the back of the boat). The masthead "sheave" where the main halyard (line that raises and lowers the sail) had an open top to it.
In the spar set I got afterward, they were plain aluminum but the hardware on them was original and in better condition. So I decided instead to use these spars on the Snark instead of the set that came with it. They would be easier to clean and by this point I had decided I wanted to paint the mast and booms. The mast also had an enclosed hole for the halyard instead of an open top which would allow the line to stay on the mast in the event of capsize.
However, like anything involving an old Snark, these spars had sat neglected for years. An old sail was wrapped around them and when I cut the line holding the spar set together, it started falling to pieces. When I got the booms apart, all that remained of the sail was that on the boom itself. The center had disintegrated years prior. So the remaining useless nylon was cut off and thrown away.
This left me with three dirty aluminum poles with some surface corrosion. Well, there's an easy way to clean up aluminum and make it ready to paint when in this condition.
Go pick up a 3M medium sanding pad from your local hardware store. The type with a sponge center and has the sanding surface wrapped around it. A medium/fine works well too. Then strip all the hardware off the spars, press the pad against the spar so it conforms and sand back and forth. The aluminum corrosion will come right off and with a few strokes, you'll be down to clean, smooth, bare aluminum.
In 10 minutes I went from dirty to shiny and clean. Wear gloves or prepare to wash your hands afterward as the aluminum residue comes off black on the surface of the spars and on your hands. Then get a clean rag or two, put some acetone on it and wipe down the spars to clean the residue off. This removes any oil from your hands and preps the metal for painting.
For paint, I went with a high gloss lacquer enamel. Valdspar from Lowe's in this case. For this boat, I wanted a black mast and booms. Pure aesthetics. I happen to like boats with black rigs.
To paint the spars, I first masked off the end cap where the halyard comes through. Now, how do you paint an 8 foot aluminum pole and its companion 10 foot aluminum poles on all sides evenly?
Lean them up against a tree.


As long as you don't mind a little paint on your tree and grass, it supports the spars and lets you get access to all sides to lay down an even coat of paint at the proper distance and you don't have to strain or find some way to rotate the spar after painting one side.
So we shake up our can of spray paint and lay down several thin coats. The Valdspar is nice because it dries to the touch in minutes and allows you to rotate the spars to get at the hidden ends on the tree and the grass. A single can is also exactly the right amount to paint all three spars.
Let the spars sit overnight and here is the result:

They didn't turn out as nicely as I hoped and it was my fault. I moved the spars from the tree to a table and they rested against each other. However, despite being dry to the touch, the paint hadn't set yet and when I went to move the spars, they stuck together and had picked up some debris that had stuck to them. Portions had gone close to metal or been roughed up. I cleaned them up as best I could since I was out of paint and figured the portions messed would be hidden by the sail anyway and pass the "10 foot" test.
We leave the spars and move on to the main attraction: hull paint.
To a lot of people, finishing the hull represents most of the work. Admittedly, in this project, the hull did represent a significant amount of the time. But that was to get the hull into a condition that I found acceptable and most of that was to accommodate the time needed for the coats of paint to dry. In reality, the biggest piece in the form of the hull is often a fraction of the work when you take into account rigging, electrics and so on. For the Snark, the hull was about half the overall work.
Now for the big question: What color scheme for our Snark? Well, there are two color schemes I prefer in sailboats. One is basic white. You can't go wrong with it. But what typically turns my head and that of many sailors are navy blue hulls with beautiful wood trim. Properly done say with AwlGrip, the finishes are gorgeous and in my view, very traditional and high class. Navy blue just makes a boat look rich. Don't believe me? Look at the color schemes for multi-million dollar megayachts. White ones look like mini cruise ships. Blue ones look wealthy.
I want my giveaway Snark to look beautiful. So I decided my paint scheme will be gloss navy blue for the hull and off-white for the interior and black for the spars. It's a beautiful mix especially with the light shade of varnish of the wood for contrast. After much back-and-forth and research, I took the advice of the Snark sailboat list and went with exterior grade latex house paint. I wanted to use a one-part marine polyurethane but all of them are petroleum-based and would have eaten the hull alive had they come in contact with the foam.
Off to Home Depot I went. So while couples are looking at color chips for their household projects, I'm looking at them for just the right shade for my boat. I went with Behr paint because it was the right type of exterior latex enamel but for another reason....
They actually have a shade of navy blue called "Sailboat"! That's a karmic hint and I asked for two gallons. One of flat off-white for the inside and the other high gloss in "Sailboat". I picked up a set of rollers and trays while I wait and walk out with my paint and the means to apply it.
Little did I know what I'd gotten myself into.
I cleaned the hull of dirt and bugs and wiped it down with acetone. Once that evaporated, I popped the can, mixed the paint, filled the tray and laid down my first coat. Magically, our hull went from a faded yellow to a bright blue:


As you can see, the bleed through of the hull below means we're looking at many coats. Which I apply. This process was the longest taking about 10 days to complete. I managed to do about 1 coat per day. I sanded the paint very, very lightly between coats because it will go back down to the hull if you sand too hard.
So we sand and paint, sand and paint. Contrast the photo of the first coat above with this one after we've applied 6 coats:

The proper shade of navy blue is beginning to appear and blotchiness of the original color is fading. It was this point I flipped the hull over to paint the interior.
The off-white is quite the contrast compared to the original yellow as these two pictures show as I started to apply the first coat of off-white to the interior:


Despite the blue needing several coats to get even coverage, the white went on nicely and dried fast. What had taken me a week to achieve with the navy blue, I achieved in a day with just two coats of off-white.
Here's the hull after the second coat of off-white:

Now she's starting to look like a proper sailboat! I was very pleased with the coverage of the off-white and the nice contrast with the navy blue. Not bad for $30 worth of house paint!
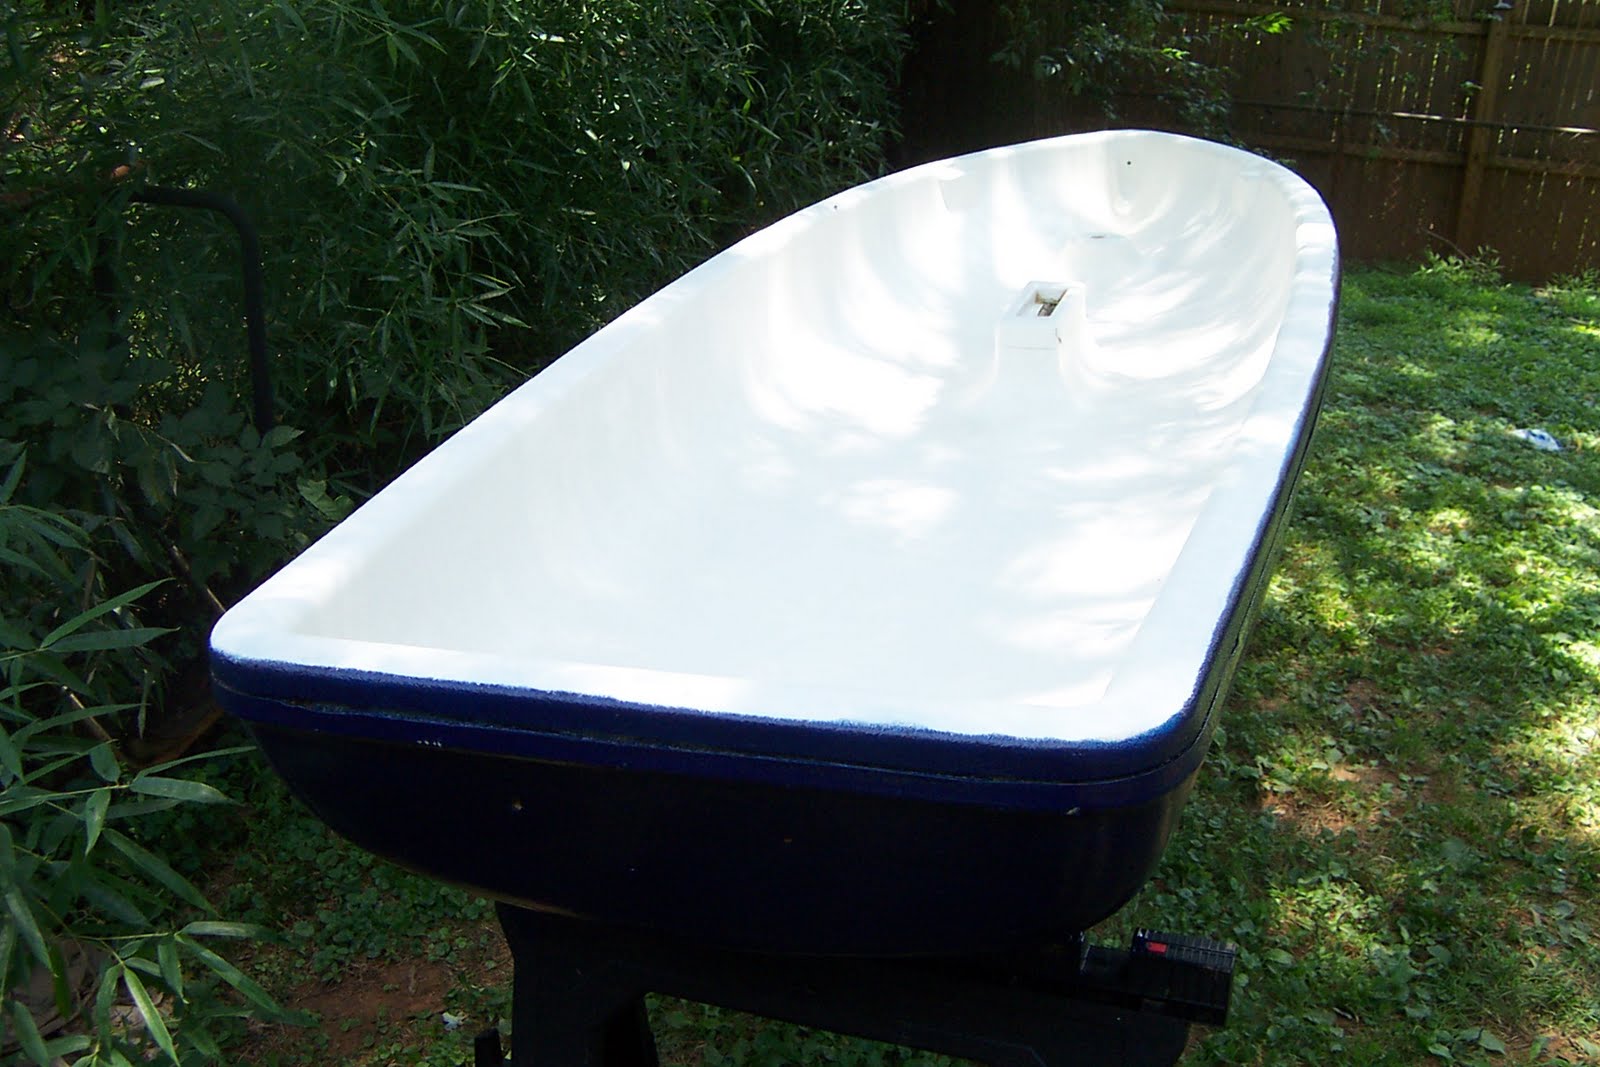
By this point I have the end in sight. After the interior paint dried, I flip the hull back over and apply three more coats of navy blue to cover the hull to my satisfaction and provide a beautiful color. Here is the end result of our hull painting effort:


Again, not perfect but I am pleased with the finish. Hopefully it will hold up nicely. With the painting work done, now it is time to bring everything together. While this work was being done, I acquired the remaining hardware needed to finish the hull and assemble the boat including the new rudder assembly, line, rigging hardware and so on.
I can say looking back a 4 inch roller was best for this work. I put the first coat on with a 9 inch roller and I had some trouble getting even paint onto the compound curves. I switched to the 3 inch roller and used that going forward before getting some additional rollers that were 4 inches instead of 3 inches. These worked very well. They allowed me good control of paint coverage and let me put a coat of paint down in about fifteen minutes. The key to doing this is many thin coats. The rollers make it easy. Use a smooth or semi-smooth roller for this work with a 3/8 inch or higher nap. That is most appropriate allow the gloss paint to settle down smooth and conform to the original hull texture.
We're heading for the finish line. In the next and final installment, we bring it all together and present our new Snark. Stay tuned!
No comments:
Post a Comment